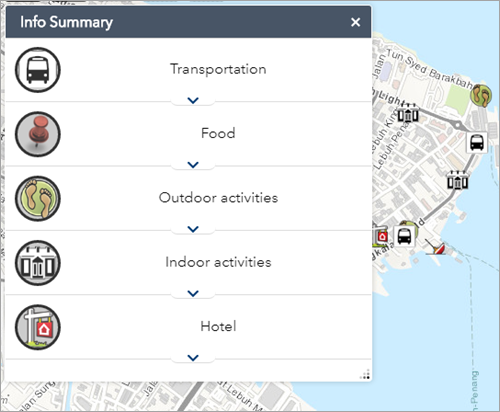
The Info Summary widget allows you to provide a count of features in the current map extent for each layer specified. Each layer in the widget panel can be expanded to show a list of features in the current extent, optionally grouped by a specified field. Point layers in the widget can be configured to display as clusters.
Note:
The Info Summary widget is now an in-panel widget. The widget placement in configured apps will no longer be on the right; it will be displayed in accordance with the current theme.
Only one instance of the widget can be added to a web application.
Configure the Info Summary widget
This widget can be set to open automatically when
an app starts. To enable this feature, click the Open this widget automatically when
the app starts button  on the widget, which turns it dark
green.
- Hover over the widget and click the Configure this widget button
 to open the configuration properties dialog box.
 - Optionally click the Change widget icon button and replace it with an image of your own.
A file explorer window appears, allowing you to select a local image file to use as the widget icon.
- Click Add Layer. Each added layer specifies a feature layer in the map to be counted and displayed by the widget. The following layer types are supported with the Info Summary widget:
- Feature service
- Feature collection
- Simple map service
- Comma-separated values (CSV) file (.csv)
- Keyhole Markup Language (KML) file (.kml and .kmz)
- GeoRSS web feed (URL)
Note:
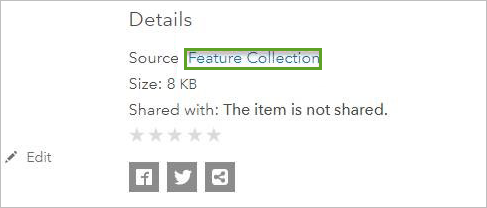
Feature Collection refresh is only supported for feature collections that are stored as a Feature Collection item in an organization. You can find this information in your item detail page.
- Optionally add a label for each layer.
- Click the edit button
 under the Display Options header to update the symbology options and panel display options.
- Use the Symbol tab to change the map symbology, enable clustering for point layers, or update the panel symbology (the symbols displayed in the widget panel).
- Use the Panel tab to manage how the list of feature information displays in the widget panel. Select a field and label under Layer Options to display a list of features using the selected attribute.
- Optionally check the Group Features check box under Group Options to group features in the list by a specified field or by the renderer used in the map.
- Optionally select Refresh for Feature Collection layer types to continually update the data using the specified interval. If the Refresh option is enabled, a refresh interval is required.
- Under Actions, change the order of layers or delete a layer.
- Optionally select Display Feature Counts to display a count of features for each layer in the widget panel.
The count displays the number of features for the selected layer.
- Optionally select Display Logo Image to add text or an image to the widget header.
- Click the Upload Image button to add an image of your own.
A file explorer window appears, allowing you to select a local image file.
- Specify text in the Main Panel Text text box to display below the logo image, for example, Last Updated.
- Click the Upload Image button to add an image of your own.
- Optionally select Expand List on Startup. This will automatically expand the first row in the panel when the widget is opened.
- Optionally select Show All Features to show the complete list and count of features for the layer regardless of the current map extent.
Note:
If one or more layers in the web map are turned off, the widget will not show the feature count for the turned off layers, even if the Show All Features check box is checked. It only shows the feature count for the visible layer’s features, regardless of their visibility in the current map extent. - Optionally select Hide Panel to enable the app to start without a visible widget panel.
Note:
If you choose the above option, you will need to configure the widget to open automatically. Setting this option ensures that the widget logic is enabled without showing the panel. - Optionally disable Preserve Cluster Symbols after Closing Widget so the cluster symbols revert to the default symbols after closing the widget.
Use the Info Summary widget
- Click the Info Summary widget button to open it.

- Click the Layer buttons to turn the layers off and on.
- Select a layer in the widget panel to expand the list of features. The list of features will be based on the current map extent or will display all features for the layer if the widget was configured to show all features. If the layer is grouped by a specified field, use the arrow to expand it, showing a list of features in the selected group.
- If the widget doesn't show all features, pan and zoom around the map to update the feature counts in the widget panel.
- Click the Info Summary widget or click the close button in the upper right corner of the widget to close it. When you close the widget, the cluster layers remain visible (unless the widget was configured to revert to the original symbols). To turn the clusters off, uncheck them in the Layer List widget.